Sunday, September 6, 2009

Garden Photos

As you can imagine... moving twice in a 7 months does not lend itself well to a fruitful garden... but we have gotten a few things.


My first crop of purple potatoes! :) It was very exciting. I think we even got enough for a dinner later this week.

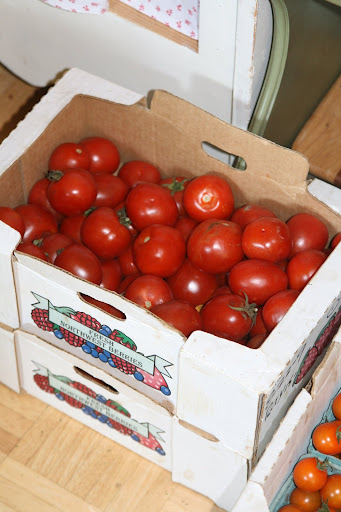
Minutes after I took this picture, that basil went into pesto for the freezer for winter. That just has to be good for you! Those tomatoes were put on nachos later that night as well... Even Logan ate them. :D My little boy is growing up.
signature

Thursday, September 3, 2009

Apple Season by Joyce Sutphen


The kitchen is sweet with the smell of apples, big yellow pie apples, light in the hand, their skins freckled, the stems knobby and thick with bark, as if the tree could not bear to let the apple go.
Baskets of apples circle the back door,
fill the porch, cover the kitchen table.

My mother and my grandmother are
running the apple brigade. My mother,
always better with machines, is standing at the apple peeler; my grandmother, more at home with a paring knife, faces her across the breadboard.
My mother takes an apple in her hand,

She pushes it neatly onto the sharp
prong and turns the handle that turns
the apple that swivels the blade pressed tight against the apple's side and peels the skin away in long curling strips that twist and fall to a bucket on the floor.
The apples, coming off the peeler,

Are winding staircases, little accordions, slinky toys, jack-in-the-box fruit, until my grandmother's paring knife goes slicing through the rings and they become apple pies, apple cakes, apple crisp. Soon they will be married to butter and live with cinnamon and sugar, happily ever after.
This was sent to me from my Aunt Pat. Her SIL sent this note along with it, I couldn't help but include the note here:
Hi: I loved the apple poem. Thanks. We had an apple tree in our back yard when we lived in Magnolia. It had three different apples - King, Golden Delicious and Winesap. It bore prodigiously. I made sauce, pies, tarts, and Waldorf salads. This was such a treat for a Florida Cracker, who usually had a singhle apple or two per year. I always approved the devil's choice in tempting Adam. An orange or a banana wouldn't have done the trick. love Dot
signature

Tuesday, September 1, 2009

The Basics of Preserving/Canning

The more you learn about canning the more you figure out that there are some basics that you just have to know... I thought that I would list out these basics. These are the ones I use year after year.

Basics of Canning
1. Get a canning book. The Ball Blue Book of Preserving is mine and I use it every single year. It has all of these rules and much much more... recipes, techniques, and even some of the science of canning. It is a sticky bible for my canning season that is constantly open each time a new fruit or veggie comes my way.

2. If you are just starting out, pick your jar lids ahead of time. For many, the small mouth makes them easier to pack the jars and get the right head space. For me, I like the wide mouths. They are easier to wash, and I use them for many storage options already. So I only purchase the wide mouth jars. I am kind of a snob about it really... but it helps SO much to know that I only have to buy one size of lid when I go to the store every year.

3. Measure your jars to 1/2 inch and 3/4 of an inch 'head space' with a ruler. Know what this looks like in the jars you choose. Then when you are filling, you don't have to wonder if you are filling them too full (which causes them not to seal) or not enough (which causes funny colors in your food.)

4. Everything has to be hot. Lids have to be hot. Jars have to be hot. Even when you are cold packing the fruit or veggies. I once thought that if I was cold packing the fruit, the jars could be cool (but clean of course) because the fruit could be cool. Not so. The jars break 10 times more often if you do it this way. (Ask me how I know.)

5. Low acid foods should be pressure canned whenever possible. Most veggies fall into this category. Most fruits do not. Tomatoes are always an iffy one... so check with your local extension office, or pressure tomatoes by default. (Your recipe has to have a lower acidity than 4.6 pH to can in a water bath canner.)

6. That brings me to another point USE YOUR LOCAL EXTENSION OFFICE! They are usually little old ladies that have been Master Food Preservers for years and years. They get additional training every year and they have wonderful resources at their disposal. They are also where you go to check if your pressure canner still works. Look in your local Yellow Pages for their number. (I have the numbers for all four counties extension offices around me taped inside my cupboard. It is a good idea to get more than one number. Esp when you need advice in the middle of canning and want to talk to a body.)

7. Pressure canners do not have to be scary! They are a useful tool and just like your average drill, they can hurt you if not used or maintained properly. BUT, just like your average drill, they can become one of the most useful tools in your food preservation arsenal.

8. There are things that it does not behoove you to can. Organic Strawberry preserves cost a LOT to process a home... I have always figured out that it is more expensive to make them than to buy them at Trader Joes. Not always because of the price of organic strawberries... but more for the price of organic sugar! I put my heart first into the stuff we eat all the time. Peaches, applesauce, blueberries, pasta sauce, green beans, etc. Some of those things, to get organic I was paying $4 more a package/jar than for the conventionally grown stuff. That is worth it to can my own. That way, I was putting all my money out at one time and spending less, instead of the prosducts slowly bleeding you via grocery bill each month. But things that only save me $.50 per jar I put low on my list. After all, my time has to be worth something... and if I calculate my time at $10 an hour (a low living wage) then I should be able to at least break even with the things I can. If I can't, then I only can those things if the opportunity falls into my lap (like I get free fruit or something) or I find that during the summer I am somehow bored and can't find something to do. (Jk... that doesn't happen.)

9. Keep a Food Preservation notebook. Write down the dates of what you ran out of and when. That way, you will not put up too much or too little for your family each year. My canning notebook is nothing more than a file at the back of my household notebook. When we run out of things too early, I list that. And I always list how many of something I put up. Like this:

Peaches: 8/28/09
5 boxes (20 - 25lbs)/ 64 quarts / 5 broke

Blueberries: 8/19/09
50 lbs / 18 gallon bags

Pesto: 9/1/09
1 1/2 lbs of basil / 10 half pints frozen

Then next to that I write the date when we run out and then average that 'per week' and figure out how much we need for the next year. Last year most of my calculations were off because Logan went from being a baby to a kid eater, and Alex... well Alex became a teen and food wasn't even safe around him. So we ran out of EVERYTHING early. This was good being that we moved twice and didn't want to move millions of jars of canned goods... but on the other hand, it compromised my local living standards a bit to run out of peaches in Jan. (This is also a good place to put down your favorite recipes... although I just put them in my Ball Blue Book of Preserving.)

It really does help to keep track. Then you know that what you are doing is worth it. Today I have done 10 more pints of tomato sauce, and 8 pints of peach butter. That has taken since 9am until 22 minutes from now when my timer goes off and I get the last batch out of the canner. That is a LOT of time! And that is only one day. I have done this now for three weeks. When I look at my notebook though, and remember that last year we ran out of peaches before Feb, I know that me doing all of this preserving is worth it and my kids will be happily eating peaches, frozen blueberries, garlic green beans, and homemade pizza sauce until next summer. And if they are not... I know to enlist them in the preservation process next year. ;)

signature

Sunday, August 30, 2009

Market Days


My market days list for this week:

Three bunches of red beets, garlic, romaine lettuce, wonderful eggs (from happy chickens), shelling peas (we are the only ones that have them this time of year due to a second crop the farm puts out, so these are prized items), summer savory (which I am drying), cilantro, broccoli, green beans, celeriac, sun gold and cherry tomatoes, blueberries, peaches, and basil.

This week was a very fruitful week for me. Basically I didn't have to put out any money whatsoever for this amazing feast of bounty I have sitting on my table in this picture. Why? Because I asked when every one was packing up if they had excess or bruised fruits and veggies that they couldn't sell but were still sound. The peaches and blueberries would have been $.50/lb, but being a vendor myself, I traded our leftover veggies for that. So I didn't even have to pay for that. But even had I paid, it wouldn't have been much and the blueberries are just for eating, the peaches are for peach butter (recipe later), and that bag of goodness you see on the bottom right??? Yeah. That's basil. About 1 1/2 lbs of basil. *glee* Look for my pesto recipe later this week. :)

That jar of yummy that is sitting in the middle is a trade for my roasted tomato sauce from another vendor. Smoke jalapeno peppers. I can't wait to try them!

signature

Friday, August 28, 2009

Preserving Food ~ Sugar-free Peach Canning Marathon 2009


I'll be perfectly honest, I don't expect anyone to be as insane as I feel right this moment and take on 120lbs of peaches for the year. Yes, we use that many. And yes, it has become a yearly ritual for me to do a lot of peaches... but wow. Last year I did 4 boxes, and this year I did 5, and just after I did all of the tomato sauce. I am not sorry, but I am CRAZY tired. I have been running on nothing but coffee and junk food for days and I feel it. In the last two days, I have spent 18 hours canning, picking up stuff for canning, or preparing to can. That doesn't include eating the junk food I have bought, or cleaning up (which I haven't done yet). BUT, if you wanted to do a box or two of peaches (which would take you an afternoon and you would still be perfectly sane at the end) this is how I do it.

First, get your stuff together. You will need:

  • "Freestone" sweet canning peaches (Ask your farmer or market guy for freestone peaches... he will know what you are talking about.)
  • Jars (for each 20 - 25lb box, you will need about 12 jars)
  • New lids
  • Rings
  • Pineapple Juice (2 46oz cans per box)
  • Honey (3 cups per box)
  • Two huge bowls (or three if you are not using your sink for the cold water bath)
  • One small garbage bowl
  • a sharp paring knife
  • A water bath canner
  • Large pot for blanching peaches
  • Large pot for syrup

Step 1: Preparing the jars and lids

Your jars should be in your dishwasher on a hot light wash. Remember the heated dry. This should also be on. The jars HAVE to be hot when you fill them or they may break during processing. (To do this outside, my friends and I had success with pouring boiling water in the clean jars and then pouring it out right before we filled them. Even just filling them half way worked out well.)

Put the lids for your jars in a small bowl or pan, and pour boiling water over them to get the seals sticky.


Step 2: Making the syrup

Hannah's amazing sugar-free peach syrup:
1 cup honey to 4 cups pineapple juice
With these measurements I figured out that one 46oz can of pineapple juice needs 1 1/2 cups of honey added to it for the right ratio. I made two cans of juice per box of peaches. Put all this in a large pan and get to a good and hot simmer... boil before adding to jars.

Step 3: Skinning and slicing the peaches

Get the large pot of water boiling and drop the peaches in it for 2 mintues. Take them out and put them in a cold water bath. Could be a large bowl, I just use my sink:

This is to help remove the skin. It comes off so easily after the hot and cold dips that you can just take it off like this:

To cut up the peaches you will use your paring knife and slice them down to the pit slowly moving around the peach. This should also work very easily with the 'freestones' and they should literally fall into the bowl as you are cutting them.

Step 4: Filling the jars

Pull the hot jars from the dishwasher and add peaches.

When you have your jar filled with peaches, add the syrup. You should add it up to about a 1/2 inch below the top of the jar. Run a knife around the outside of the jar to remove any bubbles, and if you need to, add more syrup.

After the jars are full, place the hot lid on top and put the ring on 'finger tight'.

Step 6: Processing

Place jars carefully in a waterbath canner and process covered in water that is at a rolling boil for 20 minutes.

Pull the jars out with a jar grabber and place them on a towel on your counter with some breathing room around each one for at least two hours.


Most of my jars were sticky afterward, so I washed them off once they were cool and placed them in the garage on the shelf:


Enjoy peaches on oatmeal, peach cobbler, and everything peaches all winter long.
(My kids asked if they could have a jar this morning and I flat out told them "NO". Lol... maybe I am mean, but I need to look at this sight in my pantry for a week or two before I let them dig in.)

signature

Wednesday, August 26, 2009

Preserving Food ~ Roasted Tomato Sauce


This sauce is best made with a variety of tomatoes. I used the Champions from the garden, along with the sauce tomatoes and the Sun Gold Cherry tomatoes from the farm.

Ingredients:

Tomatoes (One flat of tomatoes makes about 8 - 10 pints of sauce)
Garlic
Balsamic
Olive Oil
Sea Salt
Pepper
Italian Seasoning

Equipment:

Roasting pans (I used my glass Pyrex baking dishes)
Knife
Large spoon
garlic crusher
water bath canner
clean and hot jars, lids and rings

First, cut all tomatoes at least in half. Even the cherries. If you don't do this, they 'pop' later in cooking and give your sauce a watery consistency. Fill a baking pan with the cut tomatoes about a layer and a half deep. Crush a head of garlic into each baking dish. Drizzle with olive oil, 2 Tbs or more of balsamic vinegar, sea salt, and pepper.


Mix well and put in a 400* oven for 40 minutes. About a half hour into the roasting you will smell the tomato sauce. :) When your timer goes off, your sauce should look like this:

Then, VERY CAREFULLY, put it into a blender or food processor and process on low speed with the lid held on (but not tight, only so it doesn't splatter and burn you.) Slowly turn the speed up on the blender until you have your sauce to the consistency you want (I like mine super pureed). During this step, add your Italian Seasoning and any salt and pepper you might need to your taste.

This is what mine looks like when I am done:


At this point, it is the perfect place to let the sauce cool, and put it into bags for the freezer if you so desire. Make sure it is cooled completely in a bowl or in the blender before adding it to the freezer bags. It will separate if you freeze it warm.

Put the jar lids in a bowl of boiling water. Then fill hot, clean jars with hot sauce, and put on the lids and rings (again *very* carefully! Everything is hot at this point!). Process in a water bath canner for 40 minutes:

This is our soup base for tomato soup, our pizza sauce, spaghetti sauce, and is dumped into our chili for that tomato flare.

The process is time consuming... but oh so worth it! What an amazing taste this will be come January! If you want to try it... just make one batch to test and see if your family likes it as much as mine does. :)

signature

Monday, August 24, 2009

Market Monday!

Sorry I have been so absent. A bad burn on my left index finger has caused me to not really enjoy typing as much as usual. I got a hot glue gun (and the glue) somehow up under my finger nail and the resulting blister separated a small part of my nail from my finger... so you can imagine that the forming blister was rather painful. It took hours for it to stop throbbing. This was last Wed and just yesterday it started to feel a whole lot better. I am hoping the blister goes away soon, but for now, I am able to type. That is good.

MARKET! Market was crazy yesterday! Just nuts... but unfortunately we didn't make much money for the farm. We thought by the end of the day that the average order was about $6. We kind of got 'nickle and dimed' to death. Sigh. Hopefully we will have a better week next week.

My list:

Cabbage, Italian zucchini, cucumbers (blond and slicing), mint (for mint water, yum!), cilantro, dill, fresh Walla Walla onions, 6 heads of garlic (for tomato sauce), 3lbs of new crescent potatoes, and two heads of Lolla Rosa Lettuce:

It is the darkest, purplest lettuce ever... and it is tasty! I couldn't stop munching on it yesterday. I am excited to add this to the romaine and make the most beautiful salad ever!

But of course, my list doesn't stop there. It is food preservation season after all. I got 4 flats of tomatoes to make into sauce today. I say today because they were all getting ready to turn, and so we had them on special all day long and sold a lot... but these were still going back to the farm and wouldn't get used with the new ones coming out of the field. So I got them. :) The heads of garlic will be matched with them this afternoon to make the best sauce I have EVER had... and I am going to attempt to can it. If it works, I will be sure to post a recipe and instructions.

And peaches.

I picked up 12 boxes (that is 265lbs!!) of peaches yesterday. 5 boxes are for me and my family and then three other mamas got in on the good market deal with me and I picked up a few boxes for each of them. Peach canning marathon 2009 should be happening on Thursday night (they need to finish ripening). I have a special sugar free way to do peaches so I will be sure to post that too.

I don't stop moving in August. It just keeps going and going. I feel like an energizer bunny until about October. BUT, I love it... my freezers are full (with organic grass fed beef now too!) and my pantry is filling... it is an amazing yearly ritual that feeds us all winter. I have to admit to being really tired at the moment though. I think a day off this week will be in order where I do nothing but read good books, make lists, and watch movies. I may even throw in some junk food. LOL!

signature

Monday, August 17, 2009

Market Monday

I was so blissfully tired when I got home from market yesterday. It was a long day. I woke up way too early, and hadn't slept well the night before.... so I started off behind. I ended up getting a coke halfway through the day just so I could stop staring off into space. My sweet market partner was great through it all. She also, was not really prepared for the work of the day. 5 hours, over $2,000. Crazy busy. Food flying off the table, and us trying to juggle it all... with sleep deprived brains. We forgave each other a lot, teased each other a lot, and laughed a lot. Thank god for good friends.


My list for this week: Three pints of tomatoes (two sun golds, and one plum tomato), green onions, three bunches red beets (for this recipe), three bunches carrots, , three fresh Walla Walla Onions, Italian kale, romaine lettuce, salad bowl lettuce, 3 crookneck squash, a bunch of dill and 5 heads of wonderful Carpathian garlic. From market trades I got one dozen eggs, a full pizza for lunch, 4 large peaches, and 3 lbs doughnut peaches. Along with all that I got 10lbs of shelling peas that the kids and I are going to shell and freeze today, and 20 bunches of golden beets to preserve (like this).

Our garden is starting to produce tomatoes. *glee* We have gotten a few really ripe ones, but most of them are the orangy red of 'just before ready'. I gave Logan one of the cherry tomatoes because he asked for it... and what I knew would happen, happened:


My picky boy. He will get older, and he will love tomatoes. Just like his mama. Or he will hate them, just like his dad. Only time will tell.

signature

Preserving Food ~ Drying Fruit


I had some serious nostalgia of the little farm I grew up on while my daughter and I cut and dried fruit the other day. My mom and I would spend hours making dried bananas, apples, and cherries for our winter oatmeal. I really loved doing it with Cyan.

The cherries were first. Thank goodness for the Pampered Chef cherry pitter. Seriously, I am not a gadget person, but over the last two years, this little thing has really wormed it's way into my heart. (Pitting three pounds of cherries would have taken hours without it.)


Here is Cyan cutting the strawberries.


They dried for 10 hours and then I pulled all the ones that were done off the racks and left the others for another 5 hours.

I do need a bit of advice for drying though. How do you keep them sweet? I got them at the peek of season, I made them large pieces, and didn't over dry. And yet, every now and again, you get a REALLY bitter one. I know none of this fruit was bitter. Any ideas?

signature


Sunday, August 16, 2009

Preserving Food ~ Freexing Zucchini for bread

I learned this trick a couple years ago from my best friend Sarah.

First you wash and dry the zucchini. Then grate it into a huge bowl like the one above.

Then you open your cookbook to your favorite zucchini bread recipe and put the exact amount into little baggies that go into a big baggie in the freezer. For me, that is a cup and a half for this recipe.

Then, in Feb, when warm zucchini bread sounds delicious, you grab bag, defrost and add it to your recipe. It's brilliant actually.

And while you are still overrun with zucchini, try Ratatouille!

Ratatouille
(inspired by Nessa at Family Soup)

¼ cup olive oil
1 lg onion
4 cloves garlic
2 med crookneck squash
2 med zucchini (this equals more than the crookneck)
Coarse salt and pepper
2 red bell peppers
5 small diced tomatoes
1 heaping Tbs fresh thyme, minced
½ cup (or more) chopped basil

Put olive oil in a pan and get it hot.
Add onion and garlic until starts to clear.
Stir in squash and peppers and season liberally with coarse salt and fresh ground pepper.
Add some water to it and let cook for about 5 minutes with lid off.
Add tomatoes and thyme.
Cook until squash and peppers are crisp tender, stirring occasionally.
Add the chopped basil JUST before serving.
Toss and serve.


Serves 4

signature