The more you learn about canning the more you figure out that there are some basics that you just have to know... I thought that I would list out these basics. These are the ones I use year after year.
Basics of Canning
1. Get a canning book.
The Ball Blue Book of Preserving is mine and I use it every single year. It has all of these rules and much much more... recipes, techniques, and even some of the science of canning. It is a sticky bible for my canning season that is constantly open each time a new fruit or veggie comes my way.
2. If you are just starting out, pick your jar lids ahead of time. For many, the small mouth makes them easier to pack the jars and get the right head space. For me, I like the wide mouths. They are easier to wash, and I use them for many storage options already. So I only purchase the wide mouth jars. I am kind of a snob about it really... but it helps SO much to know that I only have to buy one size of lid when I go to the store every year.
3. Measure your jars to 1/2 inch and 3/4 of an inch 'head space' with a ruler. Know what this looks like in the jars you choose. Then when you are filling, you don't have to wonder if you are filling them too full (which causes them not to seal) or not enough (which causes funny colors in your food.)
4. Everything has to be hot. Lids have to be hot. Jars have to be hot. Even when you are cold packing the fruit or veggies. I once thought that if I was cold packing the fruit, the jars could be cool (but clean of course) because the fruit could be cool. Not so. The jars break 10 times more often if you do it this way. (Ask me how I know.)
5. Low acid foods should be pressure canned whenever possible. Most veggies fall into this category. Most fruits do not. Tomatoes are always an iffy one... so check with your local extension office, or pressure tomatoes by default. (Your recipe has to have a lower acidity than 4.6 pH to can in a water bath canner.)
6. That brings me to another point USE YOUR LOCAL EXTENSION OFFICE! They are usually little old ladies that have been Master Food Preservers for years and years. They get additional training every year and they have wonderful resources at their disposal. They are also where you go to check if your pressure canner still works. Look in your local Yellow Pages for their number. (I have the numbers for all four counties extension offices around me taped inside my cupboard. It is a good idea to get more than one number. Esp when you need advice in the middle of canning and want to talk to a body.)
7. Pressure canners do not have to be scary! They are a useful tool and just like your average drill, they can hurt you if not used or maintained properly. BUT, just like your average drill, they can become one of the most useful tools in your food preservation arsenal.
8. There are things that it does not behoove you to can. Organic Strawberry preserves cost a LOT to process a home... I have always figured out that it is more expensive to make them than to buy them at Trader Joes. Not always because of the price of organic strawberries... but more for the price of organic sugar! I put my heart first into the stuff we eat all the time. Peaches, applesauce, blueberries, pasta sauce, green beans, etc. Some of those things, to get organic I was paying $4 more a package/jar than for the conventionally grown stuff. That is worth it to can my own. That way, I was putting all my money out at one time and spending less, instead of the prosducts slowly bleeding you via grocery bill each month. But things that only save me $.50 per jar I put low on my list. After all, my time has to be worth something... and if I calculate my time at $10 an hour (a low living wage) then I should be able to at least break even with the things I can. If I can't, then I only can those things if the opportunity falls into my lap (like I get free fruit or something) or I find that during the summer I am somehow bored and can't find something to do. (Jk... that doesn't happen.)
9. Keep a Food Preservation notebook. Write down the dates of what you ran out of and when. That way, you will not put up too much or too little for your family each year. My canning notebook is nothing more than a file at the back of my household notebook. When we run out of things too early, I list that. And I always list how many of something I put up. Like this:
Peaches: 8/28/09
5 boxes (20 - 25lbs)/ 64 quarts / 5 broke
Blueberries: 8/19/09
50 lbs / 18 gallon bags
Pesto: 9/1/09
1 1/2 lbs of basil / 10 half pints frozen
Then next to that I write the date when we run out and then average that 'per week' and figure out how much we need for the next year. Last year most of my calculations were off because Logan went from being a baby to a kid eater, and Alex... well Alex became a teen and food wasn't even safe around him. So we ran out of EVERYTHING early. This was good being that we moved twice and didn't want to move millions of jars of canned goods... but on the other hand, it compromised my local living standards a bit to run out of peaches in Jan. (This is also a good place to put down your favorite recipes... although I just put them in my Ball Blue Book of Preserving.)
It really does help to keep track. Then you know that what you are doing is worth it. Today I have done 10 more pints of tomato sauce, and 8 pints of peach butter. That has taken since 9am until 22 minutes from now when my timer goes off and I get the last batch out of the canner. That is a LOT of time! And that is only one day. I have done this now for three weeks. When I look at my notebook though, and remember that last year we ran out of peaches before Feb, I know that me doing all of this preserving is worth it and my kids will be happily eating peaches, frozen blueberries, garlic green beans, and homemade pizza sauce until next summer. And if they are not... I know to enlist them in the preservation process next year. ;)


 Dehydrate for 4 - 6 hours or until done to your liking. We like ours just past crispy.
 Store in an airtight container and enjoy!


 Today I am sick. This nasty cold has gone viciously through our family this last week, starting with Logan on Tuesday and all the way through Don and I these last two days. It is only a three day thing... but wow. It's a killer. We have spent many an evening all laying on my bed, watching movies, eating popcorn or pasta for dinner.


 I have made up a tutorial in pictures, and because it has quite a few pictures showing how I did this, I decided to make it a Flickr set with instructions:


 Dishonest Blueberry Jam


 I made two varieties this year. When you have spent a full time job amount of time in your kitchen everyday for a week, you start getting 'inspired'. Well... the line between 'inspired' and 'bored' was very thin anyway.
 On the right, we have the
 I set up this table in the center of my kitchen when things get really crazy. You can see my whole set up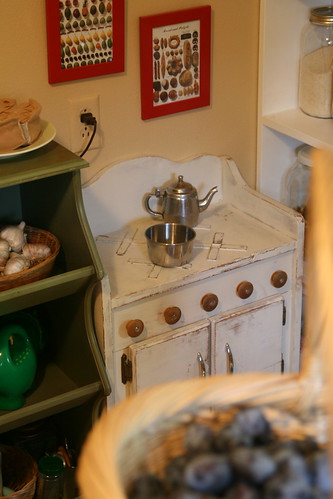


 Pull the jars out with a jar grabber and place them on a towel on your counter with some breathing room around each one for at least two hours.


 Posts
Posts

