Showing posts with label Cook-a-long. Show all posts

Friday, October 9, 2009

Preserving Food ~ Dried Apple Chips

We still have some apples left over even though our pantry is now stuffed full with strawberry applesauce, so I thought that the food dehydrator needed some more work.

I remember apple chips fondly as a child. My mom would cut them up and put them in our oatmeal, rehydrate them for baking, or even just drop some in a bowl for an afternoon snack.

A corer/peeler/slicer is really kind of essential in making these easy. It took us about 10 minutes to get fill up two dehydrators and I was teaching the kids how to do it at the same time.

It made fast work of the hard parts.

You just cut one slit down the side of the sliced/cored apple, place them on the tray, and get ready to enjoy your chips!

I have read that you can dip them in water with two capsules of Vitamin C in it and they will retain their color better. I don't mind the mild brown they took on. I think the essential part was getting them to the dryer from the cutting quickly. With my little helpers, it took no time.

Dehydrate for 4 - 6 hours or until done to your liking. We like ours just past crispy.

Store in an airtight container and enjoy!

signature

Monday, October 5, 2009

Preserving Food ~ Apple Peel Jelly


I got this idea from Callista, who made what sounds like the best jelly ever! For our family though, I can not add that much sugar in jelly, so I decided to try out an old fashioned recipe from the Ball Complete Book Of Home Preserving instead, but use her apple peel juice method, and tweak the seasonings. It turned out so wonderful and I have to share:

Old Fashioned Apple Peel Jelly

Step 1: Make the juice

First, boil the apple peels. I had a 9 quart pot filled to the brim. I added enough water so when I pushed down on the peels I could see it, and boiled. I let that simmer on low for over 3 hours once it got to a boil. I just left it there all of nap time. Then I took a colander, and set it on top of an upturned cereal bowl in my largest bowl (HUGE metal mixing bowl that I keep for canning). I don't have any cheese cloth. I didn't think that the people at the store would want me bringing the plague to them, so I figured it could drip sufficiently while I made and ate dinner. I ended up with 10 cups of liquid.

Step 2: Recipe

I then used the juice for this recipe:

4 cups apple juice
2 Tbs lemon juice
3 cups granulated sugar

(I used raw, organic sugar and it worked just fine)

Prepare lids and jars. (Here for info on how to do that)

Bring juice and lemon juice to a boil and add in sugar, stirring until dissolved.

Step 3: Season the Jelly

For Apple Pie flavor add in: 1 tea cinnamon and 1/2 tea nutmeg

For Apple Cider flavor add in: 1 Tbs whole allspice, zest of one orange, 1/4 tea cinnamon, 1 tea whole cloves (strain out at the end)

Step 4: Cooking and canning

Boil hard, stirring frequently, until mixture begins to sheet from a metal spoon. (For me it took nearly an hour... and I didn't stir it much). You do not need any added pectin for this recipe. The pectin in the apple peels will work fine. I added a pectin box the first batch I made and it make it more like jello! LOL! It still tastes great though.

Pour into prepared jars leaving 1/4 inch head space.

Process jars for 5 minutes in rolling boil, then shut off heat, and leave for 5 minutes.

Remove jars, cool, label and store.

signature

Saturday, October 3, 2009

Preserving Food ~ Apple Pie Filling

Today I am sick. This nasty cold has gone viciously through our family this last week, starting with Logan on Tuesday and all the way through Don and I these last two days. It is only a three day thing... but wow. It's a killer. We have spent many an evening all laying on my bed, watching movies, eating popcorn or pasta for dinner.

Getting sick really isn't a mother's prerogative. It seems as though it should be, but when I actually get sick, it is more like something I have to push through than 'recover from'. This week was no different. The worst day of my cold I was delivered 5 boxes of beautiful apples.

No stopping apples. So no stopping applesauce and apple pie filling. Being in Washington, I have honestly never bought apples for canning before. I have always had trees, or known people that have had trees. So this is the first time I have ever paid for boxes of apples and I wasn't about to let them go bad as I sat conversing with my tissues.

Sarah Jean's Apple Pie Filling

Granny Smith Apples
4 1/2 cups of sugar
2 Tbs cinnamon
1/2 tea nutmeg (I liked 1 tea)
1 tea salt
1 cup corn starch
10 cups water

Mix all ingredients, except corn starch. Mix the corn starch with a little water and then add it in. Boil all ingredients.

Being that this is the first time I bought apples, I forgot to ask if they were organic. Just to be on the safe side, I washed them all.

Peel and core a large bowl of apples, and cut them into halves or fourths (I like fourths, they are easier to stuff in the jars, but halves look better in the pie.)

I am saving aside the peels for Callista's Apple Pie Jelly. :)

The recipe calls for cramming as many apples in as you can up to the rim of the jar, but I found that if you fill the jar half full with apple slices, and then add a bit of the sour over those, then cram the jars with the slices it worked much better to get the sauce to the bottom of the jar.

Work bubbles out with a knife. Sauce will settle and you will want to add more in a few minutes. Add lids and submerge in hot water bath for 20 minutes.

Happy Canning!

signature

Tuesday, September 12, 2006

Strawberry Applesauce Cook-a-long

Ingredients: Apples... I have found that it entirely depends on how big the apples are, what the bag needs to weigh to fill the 8 quart pot. For me this was 11lbs worth of tiny apples that had fallen off my dads tree (first batch). 12oz of juice concentrate. Always use 100% juice concentrate. I have used cherry/apple, apple, and apple/strawberry (which I can not find this year) with great success.
Strawberries... In fact about three cups of any kind of berries will do. I have made Marionberry/blackberry, blueberry/blackberry, cherry, strawberry, and I even tried my hand at grape one day (it was much sweeter with the grape juice) and all have turned out great!

OK... so we have 3 cups of berries, apples to fill an 8 quart pot, and 12 oz of juice concentrate. So start first things first... how to chop an apple quickly. I don't like milling out seeds. So I chop my apples to leave the core behind, like this:
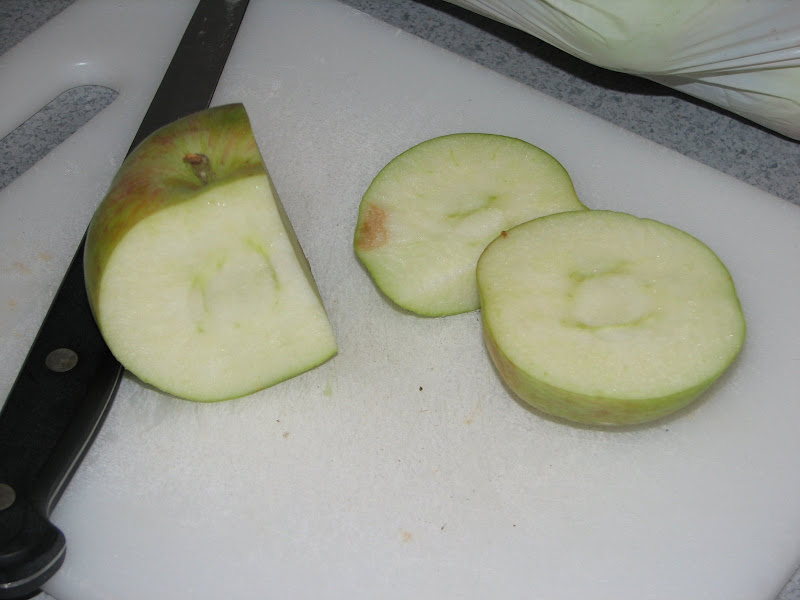

The only thing you have to remember is the near halves of apples will not cook quickly (the more skin, the slower it will cook), so you have to cut that in half one more time.

Adding them to the pot.
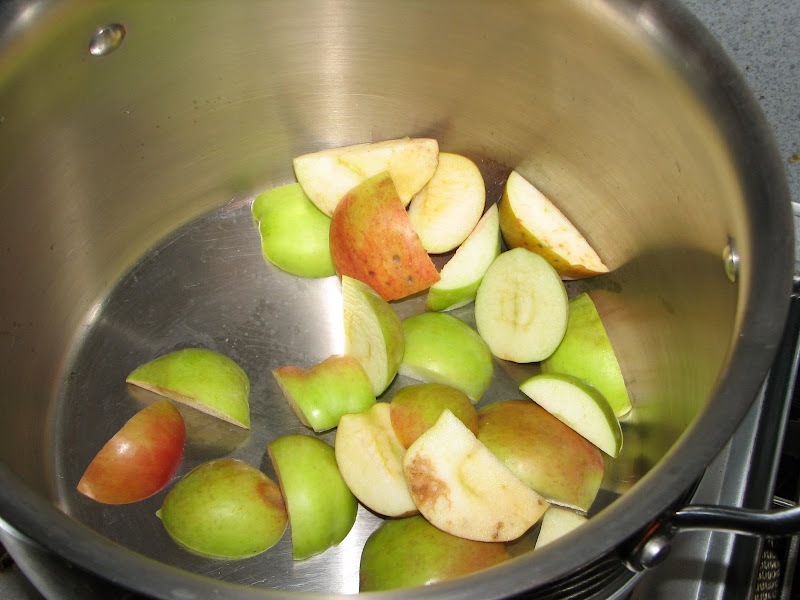
I told you these were LITTLE apples.

When you get a full pot; start the burner on.
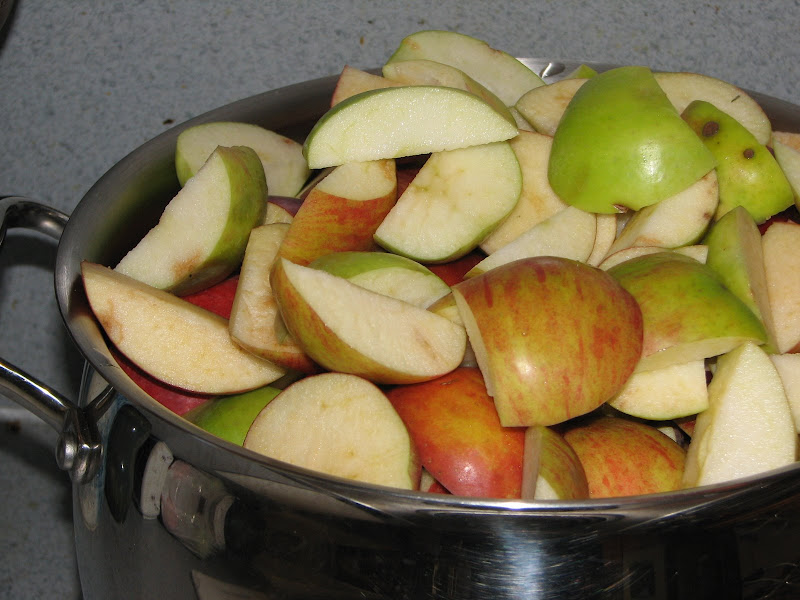

You will hear them start to sizzle at the bottom. Add the juice concentrate (frozen or not, doesn't matter) along with ONE 12oz can of water. This helps the apples not stick to the bottom of the pot and starts the "steaming/cooking" process.

When the apples are about half way cooked, then you add the berries (again, frozen or thawed, doesn't matter. They still have about 10 minutes to cook).
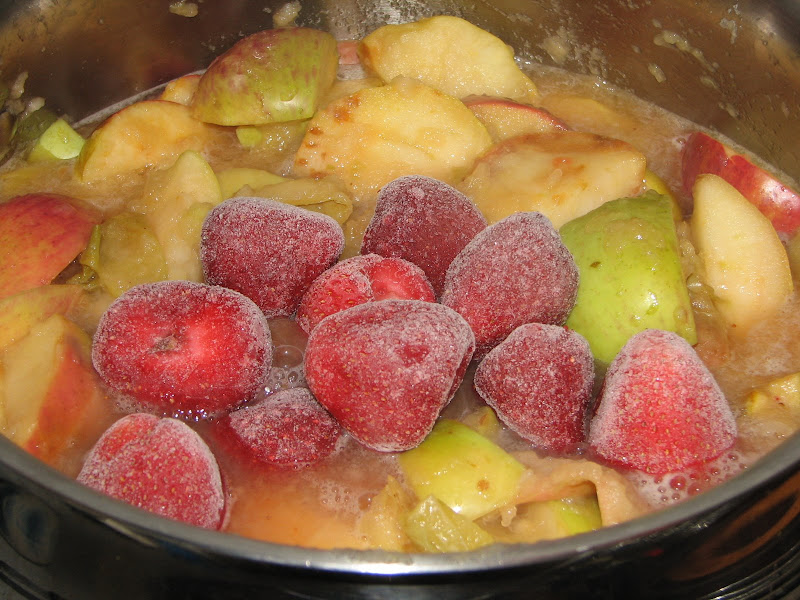
Now comes the milling. I have found that the easiest way to mill apples is to have two pots. Take laddlefulls out of the full pot and put them into the mill on top of the other pot. (This pot can be smaller as this is only going to produce 6 qts of applesauce in the end.)

Cyan decided she needed to do this part. If you cook the apples enough there is VERY little waste. (I think I got just over a cup of skins)This is the point where the taste testing is important. Call you friends and neighbors over to see if the applesauce will pass mustard. If you need a little sugar, add a little sugar. Most of the time I have found that the juice concentrate is the only sweeter we need, but with some of the varieties (like the cherry) I added 1/4 cup of sugar to the mix before canning and that brought out the 'cherry' much better than before, but added VERY little sweetness... just have fun with this part.
But becareful... it doesn't seem like it, but 1/2 a cup of sugar in this mix has been TOO much. So add slowly and taste often.

And here is the finished product. This batch passed unaltered...

Friday, August 18, 2006

Vegan Zucchini Muffins CookAlong

Canola or safflower oil for greasing muffin tins (you can use PAM too)
1 1/2 c tightly packed, coarsely grated zucchini
3 Tbs flax seeds
1/2 c water
1 1/2 c WW pastry flour
1 c barley flour (spelt works, and I also have used just unbleached in this spot)
1 Tbs baking powder (Rumford)
1 1/2 to 2 tea cinnamon
3/4 to 1 tea ground ginger
1/4 tea ground cloves (or sub 5-Spice)
1/2 tea sea salt (important to bring out the flavors... have tried it without... not quite as good)
1/2 c dried rasins, currents, or cranberries
1/2 c apple juice
1/3 c maple syrup
1/3 c canola or safflower oil
(an overripe banana is my secret ingredient to these muffins for my family... they like things a bit sweeter than the average "food muffin" fare.)

Gather your ingredients:


Gather your help, complete with cheesy grin:


#1. Brush the muffin tins with the oil and set aside.

#2. Set the zucchini in a colander over a bowl or plate to drain.


#3. In a blender, grind the flax seeds. Add the water and process more until slightly gumy mixture is acheived, about 30 seconds.


#4. In a large bowl, combine all dry ingredients including the currents/rasins.


#5. To the flax seed mixture, add the apple juice, maple syrup, oil and vanilla (and here I add in a banana as well). Process in blender until foamy, about 1 minute.

#6. Press zucchini to make sure most of the moisture is out of it.

#7. Blend the liquid mixture and the zucchini into the dry mixture, just until all of the flour is absorbed (too much more and they get dry).

(See mom! There are no eggs! I can eat the dough!!!)

#8. Fill the oiled muffin tins almost to the top with batter, and bake on the center shelf of an oven preheated to 375* until a skewer inserted into the center comes out clean and the tops bounce back to gentle pressure. (18-20 minutes in my experience)


#9. Set the muffins on a rack to cool, running a knife around the outside to remove them from the pans (you may have to remove them from the pans hot because they tend to get soggy around the bottom if you don't). Serve warm or cool or store for future use.

And what does my future Domestic Goddess in Training do while her muffins are cooking?


For vegan baking these are surprizingly simple. You dirty one spoon, one blender, one large bowl, and muffin tins, and they always come out. I experiment with these pretty often because they are such wonderful canidates, esp this time of year with all the zucchini I have running my back yard


I have added dates instead of rasins with only 5-spice as all the spices, and that turned out wonderful. It is a recipe I keep in my mental stocks for when we need a fast breakfast but not for a couple days or so... Like planning a road trip or something. These are always on the menu. They are perfect with a juice boxed size of chocolate rice milk in the car. (or with a juice box for that matter)