Sunday, August 30, 2009

Market Days


My market days list for this week:

Three bunches of red beets, garlic, romaine lettuce, wonderful eggs (from happy chickens), shelling peas (we are the only ones that have them this time of year due to a second crop the farm puts out, so these are prized items), summer savory (which I am drying), cilantro, broccoli, green beans, celeriac, sun gold and cherry tomatoes, blueberries, peaches, and basil.

This week was a very fruitful week for me. Basically I didn't have to put out any money whatsoever for this amazing feast of bounty I have sitting on my table in this picture. Why? Because I asked when every one was packing up if they had excess or bruised fruits and veggies that they couldn't sell but were still sound. The peaches and blueberries would have been $.50/lb, but being a vendor myself, I traded our leftover veggies for that. So I didn't even have to pay for that. But even had I paid, it wouldn't have been much and the blueberries are just for eating, the peaches are for peach butter (recipe later), and that bag of goodness you see on the bottom right??? Yeah. That's basil. About 1 1/2 lbs of basil. *glee* Look for my pesto recipe later this week. :)

That jar of yummy that is sitting in the middle is a trade for my roasted tomato sauce from another vendor. Smoke jalapeno peppers. I can't wait to try them!

signature

Friday, August 28, 2009

Preserving Food ~ Sugar-free Peach Canning Marathon 2009


I'll be perfectly honest, I don't expect anyone to be as insane as I feel right this moment and take on 120lbs of peaches for the year. Yes, we use that many. And yes, it has become a yearly ritual for me to do a lot of peaches... but wow. Last year I did 4 boxes, and this year I did 5, and just after I did all of the tomato sauce. I am not sorry, but I am CRAZY tired. I have been running on nothing but coffee and junk food for days and I feel it. In the last two days, I have spent 18 hours canning, picking up stuff for canning, or preparing to can. That doesn't include eating the junk food I have bought, or cleaning up (which I haven't done yet). BUT, if you wanted to do a box or two of peaches (which would take you an afternoon and you would still be perfectly sane at the end) this is how I do it.

First, get your stuff together. You will need:

  • "Freestone" sweet canning peaches (Ask your farmer or market guy for freestone peaches... he will know what you are talking about.)
  • Jars (for each 20 - 25lb box, you will need about 12 jars)
  • New lids
  • Rings
  • Pineapple Juice (2 46oz cans per box)
  • Honey (3 cups per box)
  • Two huge bowls (or three if you are not using your sink for the cold water bath)
  • One small garbage bowl
  • a sharp paring knife
  • A water bath canner
  • Large pot for blanching peaches
  • Large pot for syrup

Step 1: Preparing the jars and lids

Your jars should be in your dishwasher on a hot light wash. Remember the heated dry. This should also be on. The jars HAVE to be hot when you fill them or they may break during processing. (To do this outside, my friends and I had success with pouring boiling water in the clean jars and then pouring it out right before we filled them. Even just filling them half way worked out well.)

Put the lids for your jars in a small bowl or pan, and pour boiling water over them to get the seals sticky.


Step 2: Making the syrup

Hannah's amazing sugar-free peach syrup:
1 cup honey to 4 cups pineapple juice
With these measurements I figured out that one 46oz can of pineapple juice needs 1 1/2 cups of honey added to it for the right ratio. I made two cans of juice per box of peaches. Put all this in a large pan and get to a good and hot simmer... boil before adding to jars.

Step 3: Skinning and slicing the peaches

Get the large pot of water boiling and drop the peaches in it for 2 mintues. Take them out and put them in a cold water bath. Could be a large bowl, I just use my sink:

This is to help remove the skin. It comes off so easily after the hot and cold dips that you can just take it off like this:

To cut up the peaches you will use your paring knife and slice them down to the pit slowly moving around the peach. This should also work very easily with the 'freestones' and they should literally fall into the bowl as you are cutting them.

Step 4: Filling the jars

Pull the hot jars from the dishwasher and add peaches.

When you have your jar filled with peaches, add the syrup. You should add it up to about a 1/2 inch below the top of the jar. Run a knife around the outside of the jar to remove any bubbles, and if you need to, add more syrup.

After the jars are full, place the hot lid on top and put the ring on 'finger tight'.

Step 6: Processing

Place jars carefully in a waterbath canner and process covered in water that is at a rolling boil for 20 minutes.

Pull the jars out with a jar grabber and place them on a towel on your counter with some breathing room around each one for at least two hours.


Most of my jars were sticky afterward, so I washed them off once they were cool and placed them in the garage on the shelf:


Enjoy peaches on oatmeal, peach cobbler, and everything peaches all winter long.
(My kids asked if they could have a jar this morning and I flat out told them "NO". Lol... maybe I am mean, but I need to look at this sight in my pantry for a week or two before I let them dig in.)

signature

Wednesday, August 26, 2009

Preserving Food ~ Roasted Tomato Sauce


This sauce is best made with a variety of tomatoes. I used the Champions from the garden, along with the sauce tomatoes and the Sun Gold Cherry tomatoes from the farm.

Ingredients:

Tomatoes (One flat of tomatoes makes about 8 - 10 pints of sauce)
Garlic
Balsamic
Olive Oil
Sea Salt
Pepper
Italian Seasoning

Equipment:

Roasting pans (I used my glass Pyrex baking dishes)
Knife
Large spoon
garlic crusher
water bath canner
clean and hot jars, lids and rings

First, cut all tomatoes at least in half. Even the cherries. If you don't do this, they 'pop' later in cooking and give your sauce a watery consistency. Fill a baking pan with the cut tomatoes about a layer and a half deep. Crush a head of garlic into each baking dish. Drizzle with olive oil, 2 Tbs or more of balsamic vinegar, sea salt, and pepper.


Mix well and put in a 400* oven for 40 minutes. About a half hour into the roasting you will smell the tomato sauce. :) When your timer goes off, your sauce should look like this:

Then, VERY CAREFULLY, put it into a blender or food processor and process on low speed with the lid held on (but not tight, only so it doesn't splatter and burn you.) Slowly turn the speed up on the blender until you have your sauce to the consistency you want (I like mine super pureed). During this step, add your Italian Seasoning and any salt and pepper you might need to your taste.

This is what mine looks like when I am done:


At this point, it is the perfect place to let the sauce cool, and put it into bags for the freezer if you so desire. Make sure it is cooled completely in a bowl or in the blender before adding it to the freezer bags. It will separate if you freeze it warm.

Put the jar lids in a bowl of boiling water. Then fill hot, clean jars with hot sauce, and put on the lids and rings (again *very* carefully! Everything is hot at this point!). Process in a water bath canner for 40 minutes:

This is our soup base for tomato soup, our pizza sauce, spaghetti sauce, and is dumped into our chili for that tomato flare.

The process is time consuming... but oh so worth it! What an amazing taste this will be come January! If you want to try it... just make one batch to test and see if your family likes it as much as mine does. :)

signature

Monday, August 24, 2009

Market Monday!

Sorry I have been so absent. A bad burn on my left index finger has caused me to not really enjoy typing as much as usual. I got a hot glue gun (and the glue) somehow up under my finger nail and the resulting blister separated a small part of my nail from my finger... so you can imagine that the forming blister was rather painful. It took hours for it to stop throbbing. This was last Wed and just yesterday it started to feel a whole lot better. I am hoping the blister goes away soon, but for now, I am able to type. That is good.

MARKET! Market was crazy yesterday! Just nuts... but unfortunately we didn't make much money for the farm. We thought by the end of the day that the average order was about $6. We kind of got 'nickle and dimed' to death. Sigh. Hopefully we will have a better week next week.

My list:

Cabbage, Italian zucchini, cucumbers (blond and slicing), mint (for mint water, yum!), cilantro, dill, fresh Walla Walla onions, 6 heads of garlic (for tomato sauce), 3lbs of new crescent potatoes, and two heads of Lolla Rosa Lettuce:

It is the darkest, purplest lettuce ever... and it is tasty! I couldn't stop munching on it yesterday. I am excited to add this to the romaine and make the most beautiful salad ever!

But of course, my list doesn't stop there. It is food preservation season after all. I got 4 flats of tomatoes to make into sauce today. I say today because they were all getting ready to turn, and so we had them on special all day long and sold a lot... but these were still going back to the farm and wouldn't get used with the new ones coming out of the field. So I got them. :) The heads of garlic will be matched with them this afternoon to make the best sauce I have EVER had... and I am going to attempt to can it. If it works, I will be sure to post a recipe and instructions.

And peaches.

I picked up 12 boxes (that is 265lbs!!) of peaches yesterday. 5 boxes are for me and my family and then three other mamas got in on the good market deal with me and I picked up a few boxes for each of them. Peach canning marathon 2009 should be happening on Thursday night (they need to finish ripening). I have a special sugar free way to do peaches so I will be sure to post that too.

I don't stop moving in August. It just keeps going and going. I feel like an energizer bunny until about October. BUT, I love it... my freezers are full (with organic grass fed beef now too!) and my pantry is filling... it is an amazing yearly ritual that feeds us all winter. I have to admit to being really tired at the moment though. I think a day off this week will be in order where I do nothing but read good books, make lists, and watch movies. I may even throw in some junk food. LOL!

signature

Monday, August 17, 2009

Market Monday

I was so blissfully tired when I got home from market yesterday. It was a long day. I woke up way too early, and hadn't slept well the night before.... so I started off behind. I ended up getting a coke halfway through the day just so I could stop staring off into space. My sweet market partner was great through it all. She also, was not really prepared for the work of the day. 5 hours, over $2,000. Crazy busy. Food flying off the table, and us trying to juggle it all... with sleep deprived brains. We forgave each other a lot, teased each other a lot, and laughed a lot. Thank god for good friends.


My list for this week: Three pints of tomatoes (two sun golds, and one plum tomato), green onions, three bunches red beets (for this recipe), three bunches carrots, , three fresh Walla Walla Onions, Italian kale, romaine lettuce, salad bowl lettuce, 3 crookneck squash, a bunch of dill and 5 heads of wonderful Carpathian garlic. From market trades I got one dozen eggs, a full pizza for lunch, 4 large peaches, and 3 lbs doughnut peaches. Along with all that I got 10lbs of shelling peas that the kids and I are going to shell and freeze today, and 20 bunches of golden beets to preserve (like this).

Our garden is starting to produce tomatoes. *glee* We have gotten a few really ripe ones, but most of them are the orangy red of 'just before ready'. I gave Logan one of the cherry tomatoes because he asked for it... and what I knew would happen, happened:


My picky boy. He will get older, and he will love tomatoes. Just like his mama. Or he will hate them, just like his dad. Only time will tell.

signature

Preserving Food ~ Drying Fruit


I had some serious nostalgia of the little farm I grew up on while my daughter and I cut and dried fruit the other day. My mom and I would spend hours making dried bananas, apples, and cherries for our winter oatmeal. I really loved doing it with Cyan.

The cherries were first. Thank goodness for the Pampered Chef cherry pitter. Seriously, I am not a gadget person, but over the last two years, this little thing has really wormed it's way into my heart. (Pitting three pounds of cherries would have taken hours without it.)


Here is Cyan cutting the strawberries.


They dried for 10 hours and then I pulled all the ones that were done off the racks and left the others for another 5 hours.

I do need a bit of advice for drying though. How do you keep them sweet? I got them at the peek of season, I made them large pieces, and didn't over dry. And yet, every now and again, you get a REALLY bitter one. I know none of this fruit was bitter. Any ideas?

signature


Sunday, August 16, 2009

Preserving Food ~ Freexing Zucchini for bread

I learned this trick a couple years ago from my best friend Sarah.

First you wash and dry the zucchini. Then grate it into a huge bowl like the one above.

Then you open your cookbook to your favorite zucchini bread recipe and put the exact amount into little baggies that go into a big baggie in the freezer. For me, that is a cup and a half for this recipe.

Then, in Feb, when warm zucchini bread sounds delicious, you grab bag, defrost and add it to your recipe. It's brilliant actually.

And while you are still overrun with zucchini, try Ratatouille!

Ratatouille
(inspired by Nessa at Family Soup)

¼ cup olive oil
1 lg onion
4 cloves garlic
2 med crookneck squash
2 med zucchini (this equals more than the crookneck)
Coarse salt and pepper
2 red bell peppers
5 small diced tomatoes
1 heaping Tbs fresh thyme, minced
½ cup (or more) chopped basil

Put olive oil in a pan and get it hot.
Add onion and garlic until starts to clear.
Stir in squash and peppers and season liberally with coarse salt and fresh ground pepper.
Add some water to it and let cook for about 5 minutes with lid off.
Add tomatoes and thyme.
Cook until squash and peppers are crisp tender, stirring occasionally.
Add the chopped basil JUST before serving.
Toss and serve.


Serves 4

signature

Saturday, August 15, 2009

Tom Vilsack as USDA head... WTH???

I don't have tv... I say this because there is SO much crap out there that I want to keep clear of. But when I see things that I didn't know be used against me... like this. It makes me angry. Seriously? The president I voted for appointed a money grubbing poison toter as my head of Federal Food Regulations???? I am a bit taken aback right now. No, wait. A lot taken aback. I have a hollow feeling in the pit of my stomach that very soon they are going to start attacking the things I hold most dear. My friend Patti put it best here:

~~~~~~~~~~~~~~~~~~~~~~~~~

In the not-so-distant-future, there is a knock on my front door.
"Hello. May I help you?"

"Uh, Yes 'ma'am. We're here on behalf of the zoning commission. It's in regards to your garden."

"What about my garden?"

"We understand that it is an organic garden, is that correct?"

"Why, Yes it is."

"And you plan on feeding your family and perhaps a few friends and neighbors with this organic food; is that correct?"

"Yes, of course. Is that a problem? What is the meaning of this?"

"Ma'am, you are in direct violation of zoning code HR5467-33.463 and 1/2 which clearly states on page 345, paragraph 7, sentence 4 that 'no private citizen will produce, preserve, distribute or consume food without direct and decisive permission, authorization and regulation from thus mentioned board as well as the USDA, CIA, FBI, GMO Seeds, Inc. and, of course, da' man'. It's all right here, ma'am, in black and white.

"This is ridiculous! It's a garden, for Christ's sake!"

"Ma'am, you will have to come with us, ma'am..."

"Please! I'm sorry! I was just trying to grow cheap, healthy, real food for my family! There are only a few chickens! We just needed the eggs..."

"Chickens? Did you say you have chickens on these premises? Agent Terry, you had better call and get us back up..."
~~~~~~~~~~~~~~~~~~~~~~~~~~~~~~~~~~~

Frankly, I have a rock in my stomach... and I really really hope this doesn't go the way it seems to be. I don't know what else to say.

signature

Thursday, August 13, 2009

Frittata ~ It's whats for dinner

We have had a thunder storm over us for the past two hours and so I figured that comfort food was on the agenda.

There is something truly divine about making something that turns out this perfectly. It speaks to a housewives soul. This one gives me a special thrill because the broccoli and onion were grown by the farm and the eggs I got from the vendor next door at the farmers market. So it is all local, except for the mushrooms. Makes my heart sing to give my children food like this.

A frittata is a crustless quiche. I enjoy it because it is quick and easy, and it has endless varieties... although we tend to come back to this one over and over again. Enjoy!!

Frittata

2 Tbs butter

6 extra large eggs

1/4 cup milk

1 cup grated cheddar cheese

1/2 red onion

1/2 c broccoli cut into tiny florets

5 mushrooms

salt and pepper

Put butter into oven safe frying pan. Saute onion, and broccoli, adding in mushrooms a bit later as they take a shorter amount of time to cook. Once all are tender, salt and pepper generously and turn off heat. Mix milk and eggs, and pour strait into the still hot frying pan over the veggies. Add cheese and mix gently. Put in a 400* oven for 20 minutes.

Delicious!

signature

Preserving Food ~ Freezing Golden Beets

I don't like 'red' beets. I think they taste too metallic for me. But a couple years ago at the farm they gave me some white beets... and I fell in love. Since then I have branched out to many kinds of beets... just not the red ones. These golden beets are sweet and yummy, but not overly sugary like the Chioggia or the Sugar Beets can be. They have a perfect level of sweetness for things like stir fry and fried rice. This is what we use them for all winter.

The process for beets is very similar to the process for beans. You cut off the tops and bottoms, and then cut into 1/2 inch chunks.

Then blanch them... actually, you almost cook them with how long you have to blanch beets. You want them almost tender when you freeze them so when you put them in a stir fry or drop them into veggies for fried rice they cook evenly with everything else. This takes almost 10 minutes.

When I am freezing them in a roasted root veggie mix I boil them much less.

These beets are SO beautiful!

After blanching, drop into very cold water or an ice bath to stop the cooking quickly. Then use a colander (or a salad spinner) and get as much of the water off as possible.

Put them into bags in one layer so they freeze evenly. This means that not much goes into a gallon Ziploc, so sometimes I combine bags after they are completely frozen. That is a good way to save bags.

Update on me: Getting a cold. I knew this would happen. But at least the food that had been waiting for me is now done. None will rot if I take it easy today. :) That's what I was waiting for.

signature

Wednesday, August 12, 2009

Preserving Food ~ Big Batch Blueberry Freezing

Awe blueberries. The season for blueberries feels so short to me. I love them so much. My kids and I wait and wait for local blueberries to be ripe and then it seems like our entire world revolves around them. This year I got 30 lbs and will be getting another 10lbs next week. Yes, we really eat that many. I had to look back on my pictures to see if I actually got that many last year, and I did. They have been gone for about a month now.

Blueberry freezing is really easy. The main thing you need is space and a really clean sink:

Fill the sink with cold water, and dump about 10lbs of blueberries in it. With the wonderful nature of blueberries, most of them will sink to the bottom. And on the top, you have all the stuff you wouldn't want in your blueberry bags:

With running water in the other sink, I just take my hands and carefully sift out all of those little flower heads, the few rotten berries (if you get them from close by you and in season, you will have way less of the rotting berries.), and the few leaves.

I am slow and meticulous at it. We mostly eat them strait out of the bags, so I feel the need to be really careful with what I let into the bags.
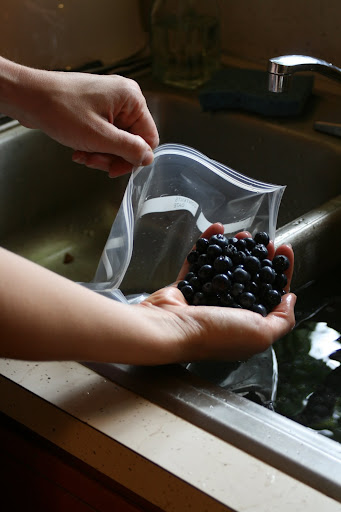
Then I put the blueberries, handful by handful into a large zip lock baggie. Once again, I keep my eye out for any dried flowers, or mushy berries that may have gotten past me when I was elbow deep in the water.

After I have half filled a bag, I pick it up and close it 90% of the way. Keeping that last little bit open, I pour the excess water back into the sink. I shuffle the berries around and pour again. As soon as no water comes out of the bag, I lay it flat, push all the air gently out of the bag (without squishing the berries) and close it the rest of the way.

Small batch preserving can be even easier than that!

If you have 10 lbs or less, drop a bunch of them into your salad spinner. Add water and follow the steps above, but in the spinner. Then use it as a colander and dump the water out of the spinner bowl. Spin for a few seconds to get off the rest of the water, and pour into bags. It's that simple!

And look what we got from our tomato experiment yesterday. Our very first ripe (not cherry) tomato!

signature